Setting Up Your First Node.js Application
🌱 Introduction — Let’s Set the Mood
Socho tum ek simple JavaScript developer ho jo ab tak sirf browser mein code chalata aaya hai — buttons, forms, animations… bas frontend ka duniya.
Ab ek din tum sochte ho:
👉 “Kya main backend bhi bana sakta hoon?”
👉 “Kya main apna server khud run kar sakta hoon?”
Aur yahin se start hota hai Node.js ka real magic.
Node.js tumhe allow karta hai JavaScript ko browser se bahar le jaane ke liye — matlab ab tum apna server, API, backend logic sab khud bana sakte ho.
Chapter 1: Introduction to Node.js
What is Node.js?
Node.js ek runtime environment hai jo JavaScript ko browser ke bahar run karne deta hai.
Simple meaning:
Pehle JS sirf browser mein chalti thi
Ab Node.js ki wajah se server par bhi chalti hai
Why Node.js?
Fast execution (V8 engine use karta hai)
Backend development ke liye perfect
APIs, servers, real-time apps banane ke liye use hota hai
Chapter 2: Installing Node.js (OS Neutral Setup)
Step 1: Download
Official website:
Always download LTS version
Step 2: Install
Installation steps (Windows / Mac / Linux same flow):
Installer download karo
Run karo
Next → Next → Install
Finish
Bas Node system mein install ho jata hai
Chapter 3: Verify Installation
Check Node
node -v
Explanation:
node→ runtime command-v→ version check
Output:
v20.x.x
Check npm
npm -v
Explanation:
npm = Node Package Manager
packages install karne ke liye use hota hai
Chapter 4: Understanding Terminal + Project Setup
Step 1: Folder Create
mkdir my-first-node-app
cd my-first-node-app
Explanation:
mkdir→ folder banata haicd→ folder ke andar jata hai
Step 2: Initialize Project
npm init -y
Explanation:
Node project initialize hota hai
package.jsonfile create hoti hai-y= default settings accept
package.json kya hai?
Ye project ka brain hota hai
Contains:
Project name
Version
Dependencies
Entry file
Chapter 5: First JavaScript File
Step 1: File create
app.js
Step 2: Code likho
console.log("Hello Node.js 👋");
Code Explanation:
console.log()
Output print karta hai terminal mein
Debugging ke liye use hota hai
String
"Hello Node.js"simple message hai
Step 3: Run file
node app.js
Explanation:
node→ runtime start hota haiapp.js→ file execute hoti hai
Hello Node.js 👋
Chapter 6: Node REPL (Interactive Mode)
Node.js REPL ek interactive console hai jahan JS instant run hoti hai.
Start REPL
node
Prompt aata hai:
>
First Execution
5 + 10
Output:
15
Explanation:
REPL code ko instantly evaluate karta hai
File banane ki zarurat nahi hoti
Exit REPL
.exit
Chapter 7: How Node Executes Code
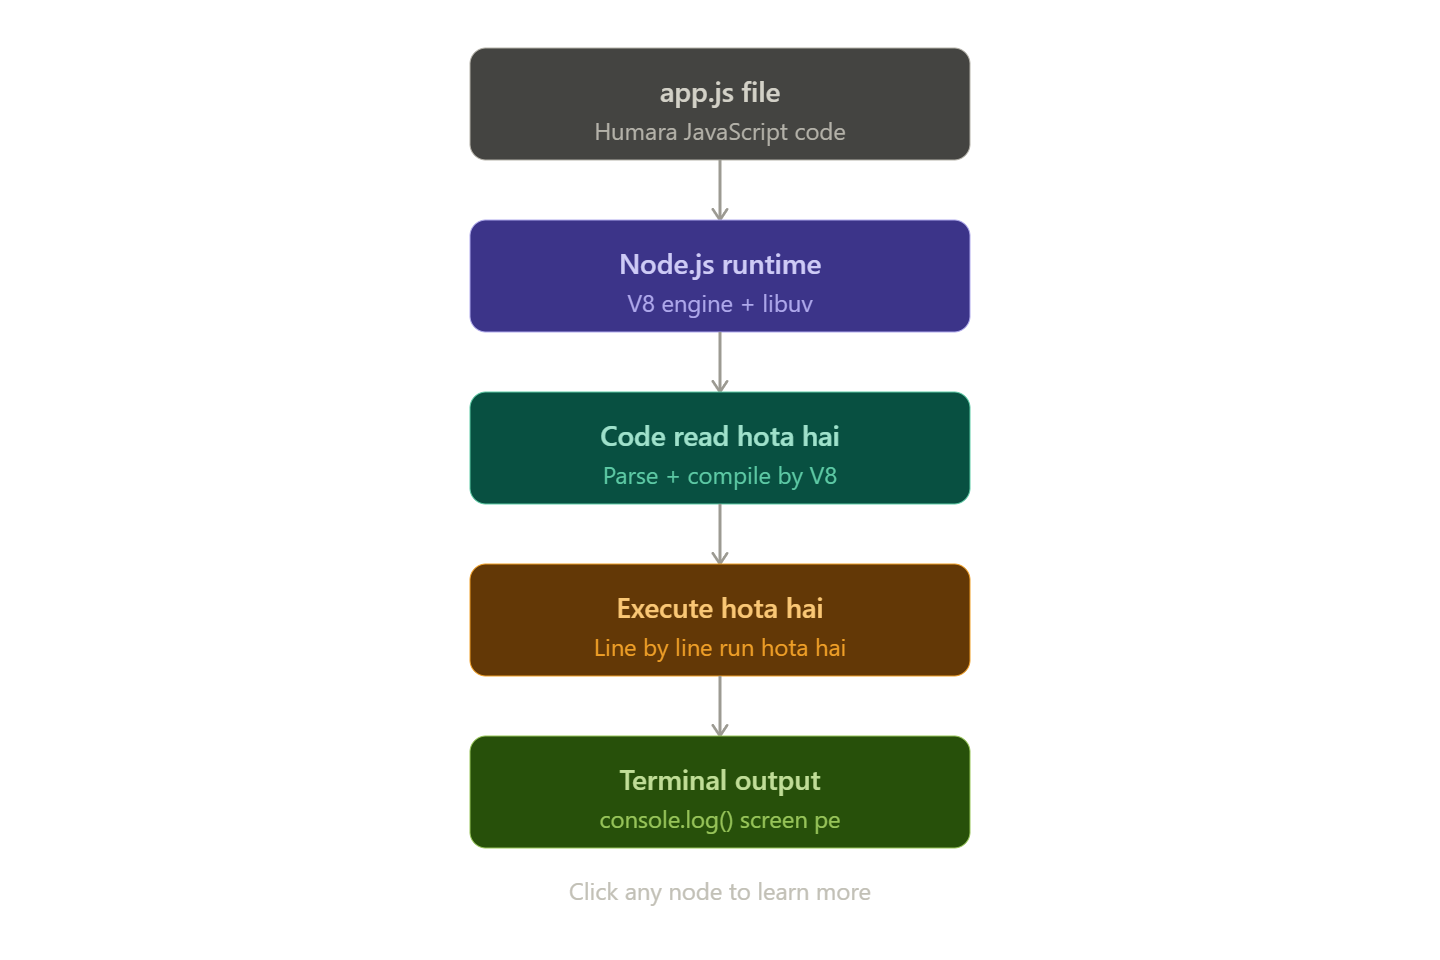
Simple Meaning:
Node ek engine ki tarah JS file ko run karta hai
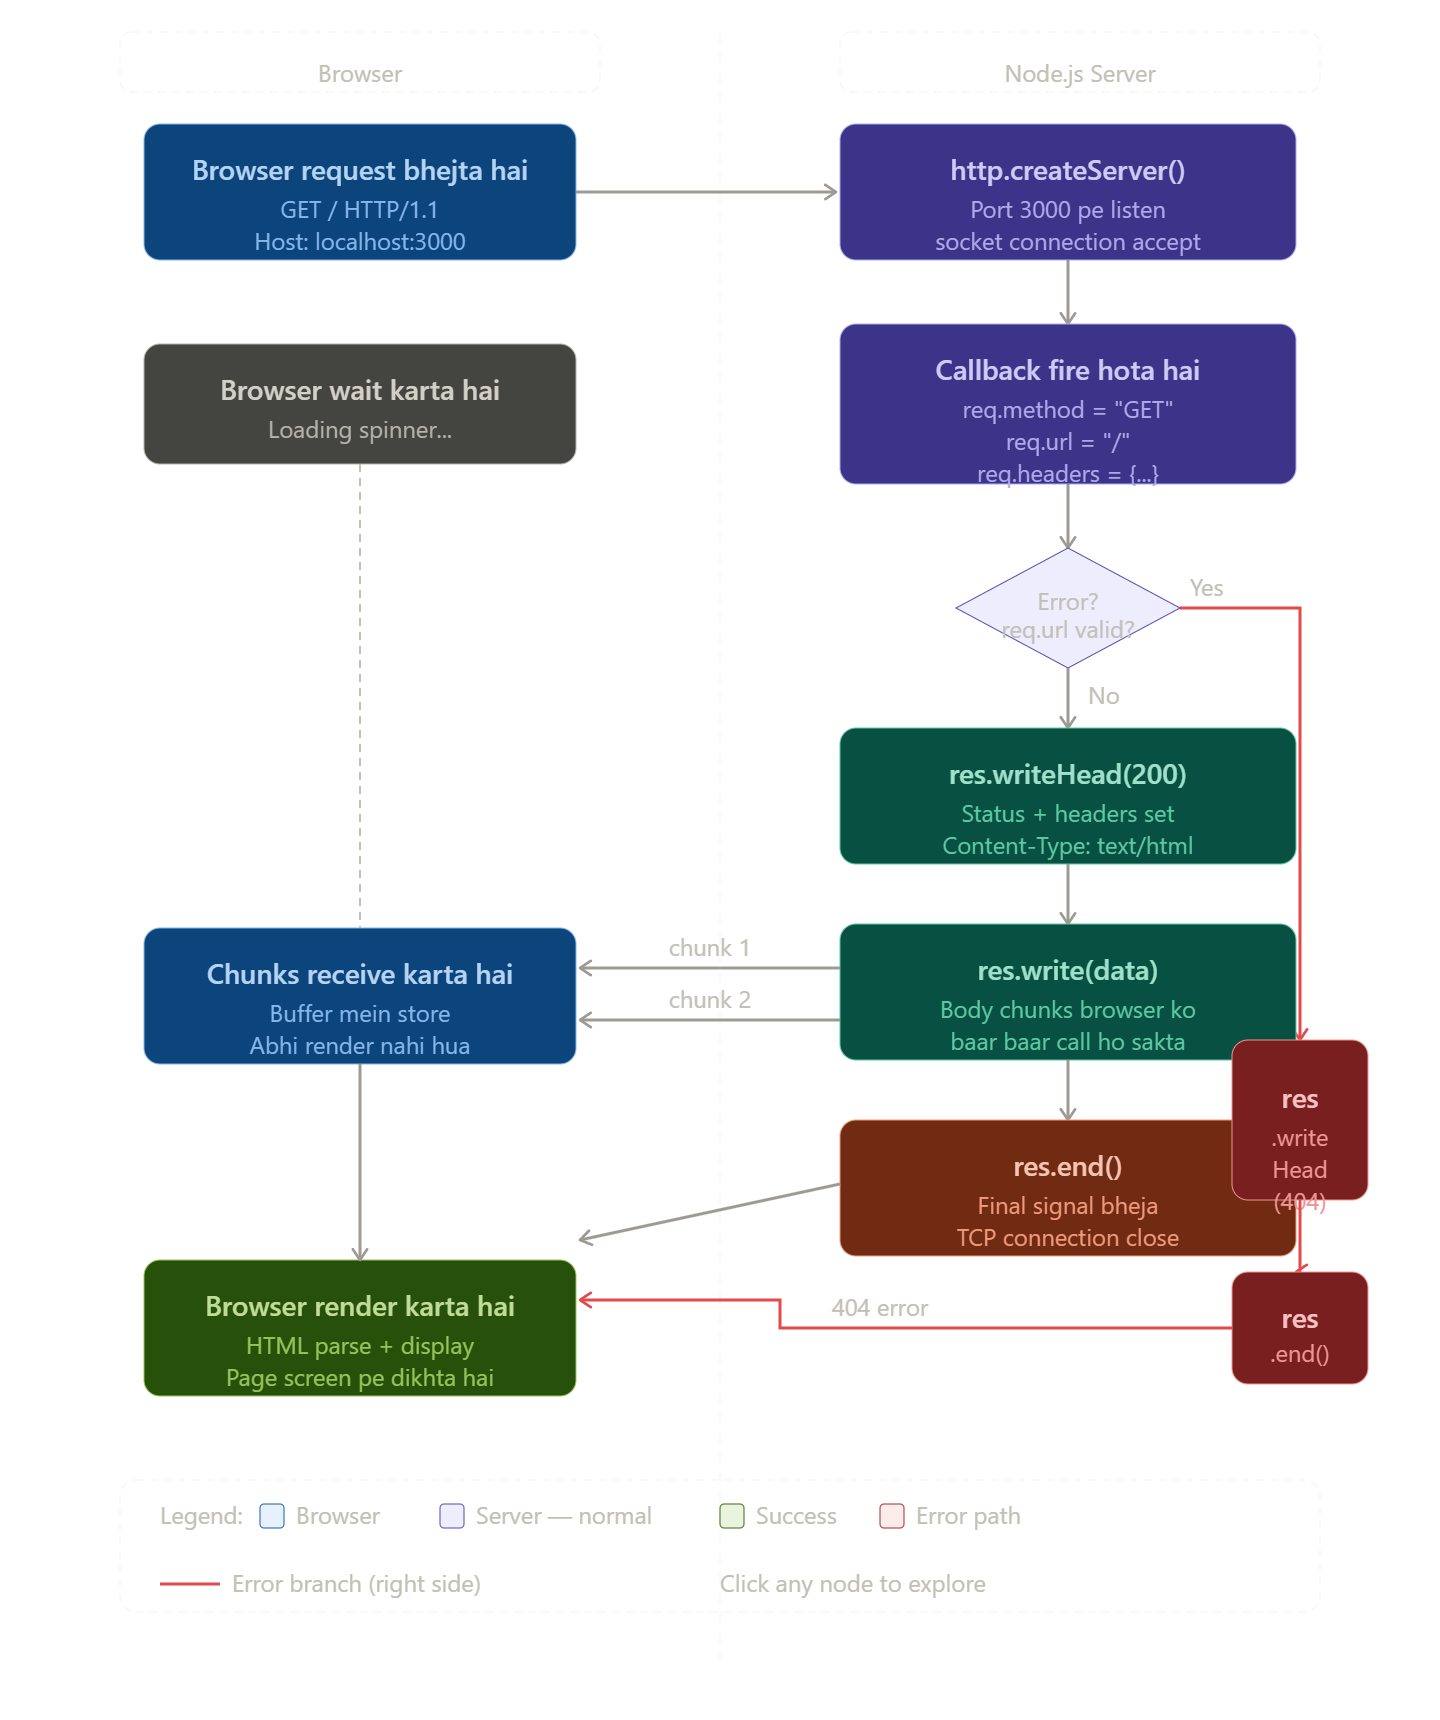
Chapter 8: First HTTP Server (Real Backend Start)
const http = require("http");

const server = http.createServer((req, res) => {
  res.write("Hello World 👋");
  res.end();
});

server.listen(3000, () => {
  console.log("Server running on port 3000");
});
Line-by-Line Explanation:
- Import module
const http = require("http");
Built-in module load hota hai
HTTP server banane ke liye use hota hai
2. Create server
const server = http.createServer((req, res) => {
Server create hota hai
req= request (browser se aaya data)res= response (hum bhejte hain)
3.Response
res.write("Hello World 👋");
Browser ko message bhejta hai
4.End Response
res.end();
Response complete karta hai
5.Start server
server.listen(3000);
Port 3000 par server run hota hai
6.Run Server
node app.js
Output:
Server running on port 3000
Browser:
Hello World 👋
Chapter 9: Server Working Flow