I build 1 Million Checkboxes App
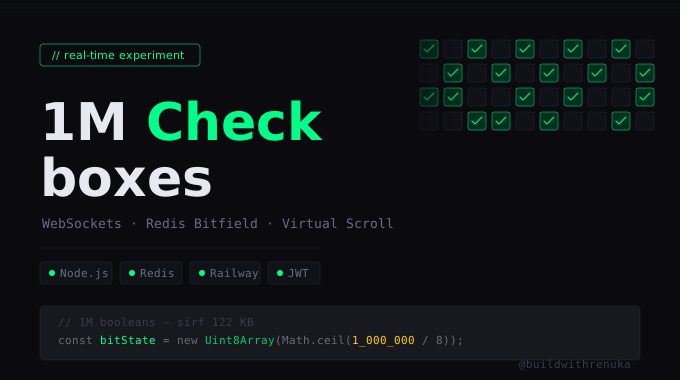
Real-time WebSockets, Redis Bitfields, Virtual Scrolling, aur Railway Deployment — ek beginner ka safar
Kuch din pehle mujhe ek project assignment mila — 1 Million Checkboxes banana hai. Real-time. Multiple users ke liye. WebSockets ke saath. Redis ke saath. Authentication ke saath.
Pehli reaction? "Yeh toh impossible lag raha hai."
Lekin jab banaya, toh realize hua ki yeh project ek ke baad ek interesting problems solve karta hai. Har problem ne mujhe kuch naya sikhaya. Is article mein main woh sab share kar rahi hoon — step by step, beginner-friendly tarike se.
Problem #1 — 1 Million Checkboxes Store Kaise Karein?
Pehla sawaal yahi tha. Agar hum ek MongoDB ya PostgreSQL table banayein jisme 1M rows hoon — toh woh impractical hai. Agar Redis mein 1M alag keys banayein — toh memory waste hai.
Solution: Redis Bitfield / Binary String
Socho aise — ek checkbox ka state sirf do values le sakta hai: checked ya unchecked. Matlab 0 ya 1. Matlab ek bit.
1 million bits = 1,000,000 ÷ 8 = 125,000 bytes = sirf 122 KB.
Redis mein hum ek single binary string store kar sakte hain jisme har bit ek checkbox represent karta hai:
// Checkbox #42 toggle karna hai
const byteIndex = Math.floor(42 / 8);  // konsa byte?
const bitIndex  = 42 % 8;              // us byte ka konsa bit?
const mask      = 1 << bitIndex;

// Current byte padhna
const buf     = await redis.getrangeBuffer("checkboxes", byteIndex, byteIndex);
const byte    = buf.length ? buf[0] : 0;

// XOR se bit flip karo
const newByte  = byte ^ mask;
const newValue = (newByte & mask) !== 0;  // true = checked

// Wapas save karo
await redis.setrange("checkboxes", byteIndex, Buffer.from([newByte]));
Seekha kya: Data ko efficiently represent karna engineering ka core skill hai. Har checkbox ke liye alag database row banana "easy" lagta hai lekin scale pe fail hota hai. Bitfield approach 1000x efficient hai.
Problem #2 — Real-Time Updates Kaise Bhejein?
Agar User A checkbox toggle kare aur User B ko immediately dikhna chahiye — toh traditional HTTP request se kaam nahi chalega. HTTP request-response model hai — client puchhe tabhi server jawab deta hai.
Solution: WebSockets
WebSocket ek persistent, two-way connection hai client aur server ke beech. Ek baar connect hone ke baad, server khud se bhi client ko message bhej sakta hai.
// Server side
wss.on("connection", (ws, req) => {
  ws.on("message", async (raw) => {
    const { index } = JSON.parse(raw);
    await toggleCheckbox(index);  // Redis update
    // Broadcast Redis pub/sub se hoga
  });
});

// Client side
ws = new WebSocket(`wss://your-app.railway.app?token=${token}`);

ws.onmessage = (event) => {
  const data = JSON.parse(event.data);
  if (data.type === "UPDATE") {
    setBit(data.index, data.value ? 1 : 0);  // local state update
    renderWindow();  // screen refresh
  }
};
Seekha kya: WebSockets real-time applications ki backbone hain — chat apps, live dashboards, collaborative tools — sab yehi use karte hain.
Problem #3 — Multiple Servers? Redis Pub/Sub
Ek server pe toh WebSocket broadcast simple hai — wss.clients.forEach(...). Lekin agar 2 server instances hoon (load balancing)? User A Server 1 se connected hai, User B Server 2 se. Server 1 ko update kaise pata chalega ki Server 2 ke clients ko bhi bhejein?
Solution: Redis Pub/Sub
Redis ek messaging channel ki tarah kaam karta hai. Koi bhi server publish kare, har subscribe kiya hua server ko message milta hai.
// Teen alag Redis connections chahiye
const redis = new Redis();  // normal commands
const pub   = new Redis();  // publish ke liye
const sub   = new Redis();  // subscribe ke liye (yeh block hoti hai)

// Subscribe karo ek channel pe
sub.subscribe("checkbox_updates");

sub.on("message", (_channel, message) => {
  const data = JSON.parse(message);
  // Apne server ke saare connected clients ko bhejo
  wss.clients.forEach((client) => {
    if (client.readyState === 1) {
      client.send(JSON.stringify({ type: "UPDATE", ...data }));
    }
  });
});

// Checkbox toggle hone ke baad publish karo
await pub.publish("checkbox_updates", JSON.stringify({ index, value: newValue }));
Yahan ek important baat — ioredis mein sub connection ko subscribe mode mein daalne ke baad usse normal commands ke liye use nahi kar sakte. Isliye teen alag connections banaye: redis, pub, sub.
Seekha kya: Distributed systems mein coordination ke liye messaging queues aur pub/sub patterns essential hain. Yeh pattern production apps mein everywhere hai.
Problem #4 — Browser Mein 1M Checkboxes Render Kaise Karein?
Yeh sabse interesting problem thi. Maine socha — 1M <div> ya <label> DOM mein daal deta hoon.
Browser ne kiya crash. 😅
1 million DOM elements = ~500MB RAM + minutes of initial render. Yeh possible hi nahi hai.
Solution: Virtual Scrolling
Key insight yeh hai — user ek waqt mein sirf ~1000-1500 checkboxes dekh sakta hai screen pe. Baki sab toh viewport ke bahar hain. Toh sirf visible checkboxes render karo!
const TOTAL = 1_000_000;
const COLS  = 50;           // checkboxes per row
const ROW_H = 22;           // pixels per row

// Poora state memory mein — sirf 122 KB!
const bitState = new Uint8Array(Math.ceil(TOTAL / 8));

function getBit(i) { return (bitState[i >> 3] >> (i & 7)) & 1; }
function setBit(i, val) {
  if (val) bitState[i >> 3] |=  (1 << (i & 7));
  else     bitState[i >> 3] &= ~(1 << (i & 7));
}

function renderWindow() {
  const scrollTop  = viewport.scrollTop;
  const viewH      = viewport.clientHeight;
  const firstRow   = Math.max(0, Math.floor(scrollTop / ROW_H) - 5);
  const lastRow    = Math.min(totalRows - 1, Math.ceil((scrollTop + viewH) / ROW_H) + 5);

  // Sirf visible rows ke cells DOM mein daalo
  const firstIdx = firstRow * COLS;
  const lastIdx  = Math.min(TOTAL - 1, lastRow * COLS + COLS - 1);

  // translateY se grid ko sahi position pe rakh
  grid.style.transform = `translateY(${firstRow * ROW_H}px)`;

  // Spacer se scrollbar correct height dikhata hai
  spacer.style.height = `${totalRows * ROW_H}px`;
}

// Scroll event pe re-render (rAF se throttled)
viewport.addEventListener("scroll", () => {
  requestAnimationFrame(renderWindow);
});
Trick yeh hai:
Ek tall
#spacerdiv jiska height = total rows × row height — isse scrollbar sahi dikhta hai#gridCSStransform: translateY()se sirf visible area pe position hota haiDOM mein sirf ~1500 cells hote hain, chahe total 1M ho
Seekha kya: UI performance ke liye virtualization ek must-know technique hai. React Virtual, TanStack Virtual — sab yehi karte hain under the hood.
Problem #5 — Authentication Kaise Karein?
Assignment mein OIDC/OAuth tha, lekin practical approach ke liye maine simple JWT-based auth banaya — concept same hai.
Flow:
User → Register (email + password)
     → bcrypt se hash → Redis mein store

User → Login (email + password)
     → hash compare → JWT token generate → client ko do

Client → WebSocket connect karte waqt token query param mein bhejo
       → Server verify kare → tab hi updates bhejne do
// Register
const hash = await bcrypt.hash(password, 10);
await redis.hset("users", email, hash);

// Login
const hash  = await redis.hget("users", email);
const match = await bcrypt.compare(password, hash);
if (match) {
  const token = jwt.sign({ email }, JWT_SECRET, { expiresIn: "24h" });
  res.json({ token });
}

// WebSocket auth
const user = jwt.verify(token, JWT_SECRET);
// Invalid token? Connection close karo immediately
Seekha kya: Authentication ke core concepts — hashing, tokens, verification — samajh aaye. bcrypt slow hashing kyun use karta hai (rainbow table attacks rokne ke liye) yeh bhi clear hua.
Problem #6 — Rate Limiting Bina Package Ke
Assignment mein clearly likha tha — express-rate-limit ya koi bhi external rate-limit package use nahi karna. Khud banana tha.
Solution: Redis Counter + TTL
async function isRateLimited(userId) {
  const key   = `rate:${userId}`;
  const count = await redis.incr(key);   // counter badhao
  if (count === 1) {
    await redis.expire(key, 1);          // 1 second ke baad automatically delete
  }
  return count > 10;                     // 10 se zyada? Rate limited!
}
Logic simple hai:
Pehli request pe counter banao, 1 second ka TTL set karo
Har request pe counter badhao
Agar 1 second mein 10 se zyada requests — block karo
1 second baad Redis key khud delete ho jaati hai — fresh window
Seekha kya: Rate limiting ka fundamentals — sliding window, fixed window, token bucket — in sab algorithms ka base yahi logic hai.
Problem #7 — Railway Pe Deploy Kaise Karein?
WebSockets ke saath Vercel use nahi kar sakte — Vercel serverless hai, persistent connections support nahi karta. Railway best option tha.
Yeh section seedha nahi gaya. Bahut zyada struggle kiya — aur uss struggle se bahut kuch seekha. Isiliye honestly likh raha hoon.
Mistake #1 — new Redis() hardcode kiya tha
Local mein new Redis() kaam karta hai kyunki Redis localhost pe hi hota hai. Production mein yeh fail hota hai — REDIS_URL environment variable se connect karna padta hai:
// GALAT — sirf local pe kaam karta hai
const redis = new Redis();

// SAHI — har jagah kaam karta hai
function createRedisClient(url) {
  if (!url) return new Redis(); // local fallback
  const parsed = new URL(url);
  const isTLS  = url.startsWith("rediss://");
  return new Redis({
    host:     parsed.hostname,
    port:     parseInt(parsed.port, 10),
    password: decodeURIComponent(parsed.password),
    username: parsed.username || "default",
    tls:      isTLS ? { rejectUnauthorized: false } : undefined,
  });
}
const redis = createRedisClient(process.env.REDIS_URL);
Mistake #2 — Railway ka internal Redis networking
Railway mein Redis add kiya toh REDIS_URL internally redis.railway.internal pe point karta hai. Yeh sirf tab kaam karta hai jab dono services ek hi private network mein hoon — aur mere saath ghanton tak connect nahi hua.
Solution: Upstash Redis use karo — managed Redis service jo reliable external URL deti hai rediss:// format mein. Free tier mein 10,000 commands/day milti hain.
rediss://default:PASSWORD@us1-xxxx.upstash.io:6379
rediss:// — double s — TLS enabled connection hai. Upstash pe yeh default hota hai.
Mistake #3 — __dirname ES Modules mein alag hota hai
CommonJS mein __dirname directly available hota hai. ES Modules ("type": "module") mein manually banana padta hai:
import { fileURLToPath } from "url";
import { dirname, join } from "path";

const __filename = fileURLToPath(import.meta.url);
const __dirname  = dirname(__filename);
Aur agar app/index.js hai aur public/ root mein — toh path .. se upar jaana padta hai:
// app/index.js se public/ root mein jaane ke liye
app.use(express.static(join(__dirname, "..", "public")));
Mistake #4 — localhost hardcode kiya tha frontend mein
// GALAT — Railway pe toot jaata hai
await fetch("http://localhost:3000/auth/login", ...);
new WebSocket("ws://localhost:3000?token=...");

// SAHI — same origin use karo, har jagah kaam karta hai
const API_BASE = window.location.origin;
const WS_BASE  = API_BASE.replace(/^http/, "ws"); // https → wss automatic!

await fetch(`${API_BASE}/auth/login`, ...);
new WebSocket(`\({WS_BASE}?token=\){token}`);
Mistake #5 — Variable value mein key bhi likh diya
Railway Raw Editor mein yeh galti ki:
# GALAT — value mein key bhi aa gayi
REDIS_URL=redis://default:password@host:6379   ← Railway ne poora string as value store kiya
Seedha URL hi value honi chahiye — REDIS_URL= prefix nahi.
Final deploy steps jo kaam kiye:
# 1. GitHub pe push karo
git push origin main

# 2. railway.app pe:
#    New Project → Deploy from GitHub → repo select karo

# 3. Upstash pe Redis banao (upstash.com)
#    TLS enable karo → rediss:// URL copy karo

# 4. Railway Variables mein:
REDIS_URL=rediss://default:PASSWORD@us1-xxxx.upstash.io:6379
JWT_SECRET=your-long-random-secret
TOTAL_CHECKBOXES=1000000

# 5. Settings → Networking → Generate Domain
Logs mein yeh dikhna chahiye tab:
REDIS_URL SET: ✅
Subscribed to Redis channel: checkbox_updates
Server on http://localhost:8080
Things I learnt-
Is project se pehle mujhe in mein se koi cheez properly samajh nahi aati thi:
Bitfields — Data ko bits mein pack karna. Ab jab bhi koi boolean array store karni ho, pehla khayal yahi aata hai.
WebSocket lifecycle — onopen, onmessage, onclose, onerror — aur yeh ki server-side wss.clients ek Set hai.
Redis ke multiple use cases — simple key-value se zyada: pub/sub messaging, binary data storage, rate limiting counters — sab ek hi tool mein.
Virtual DOM vs Virtual Scrolling — dono alag cheezein hain. Virtual scrolling DOM elements ko recycle karta hai, virtual DOM diffing karta hai.
__dirname ES Modules mein — import.meta.url se banana padta hai, directly available nahi hota CommonJS ki tarah.
new Redis() production mein kaam nahi karta — hamesha REDIS_URL environment variable se connect karo.
Railway internal networking tricky hai — managed external Redis (Upstash) zyada reliable hai beginners ke liye.
rediss:// vs redis:// — double s TLS hai. Upstash jaise managed services pe TLS mandatory hoti hai — bina TLS ke connect nahi hoga.
Tech Stack Summary
| Layer | Technology | Kyun |
|---|---|---|
| Frontend | Vanilla JS + HTML | Koi framework nahi — sab seedha samajh aaya |
| Backend | Node.js + Express | Simple, fast, WebSocket friendly |
| Real-time | ws package |
Lightweight WebSocket server |
| State store | Redis bitfield | 1M booleans = 122 KB |
| Managed Redis | Upstash | Reliable external Redis, TLS support |
| Messaging | Redis Pub/Sub | Multi-instance broadcast |
| Auth | JWT + bcrypt | Stateless, secure |
| Rate limiting | Redis counter + TTL | No external package |
| Deployment | Railway | WebSocket support, GitHub integration |
Github repo: https://github.com/buildwithrenuka/1-Million-Checkbox-Assignment


