Handling File Uploads in Node.js
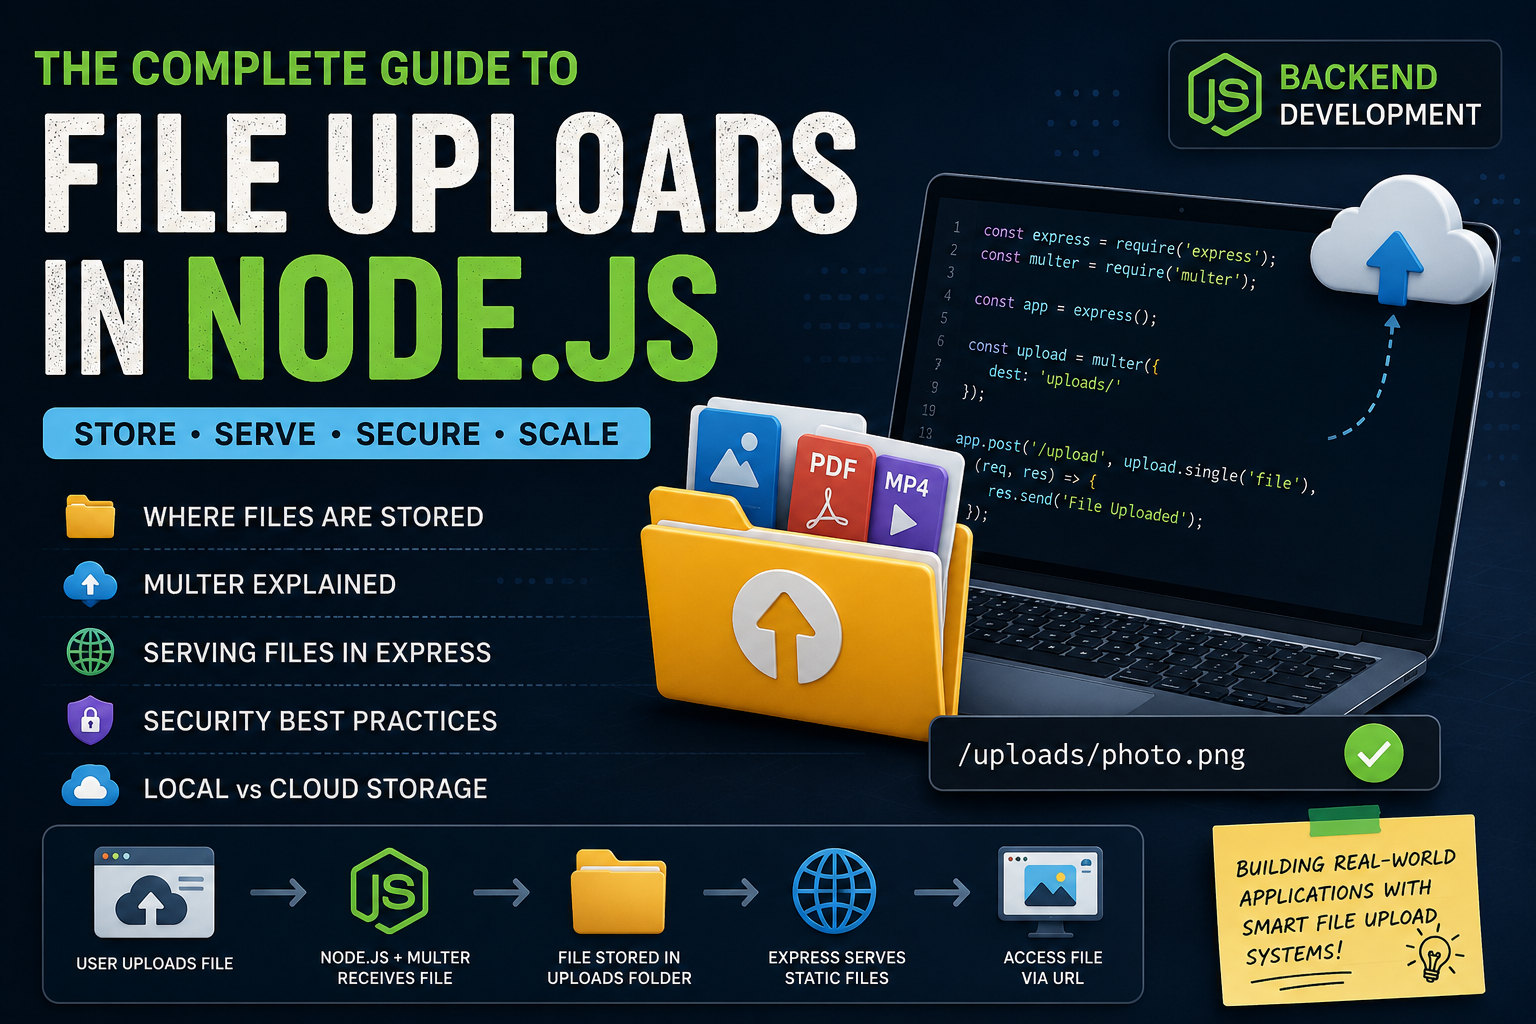
Real-world applications mein users bahut tarah ki files upload karte hain — jaise:
Profile photos
PDFs
Videos
Documents
Resumes
Lekin backend ka kaam sirf file receive karna nahi hota.
Humein ye bhi samajhna hota hai:
File kaha store hogi
File browser mein kaise dikhegi
File secure kaise rahegi
Server ko safe kaise rakhenge
Is chapter mein hum pura upload system step-by-step samjhenge
Lesson 1: Browser File Kaise Send Karta Hai?
Jab user file choose karta hai:
<input type="file" name="profile">
Aur form submit karta hai…
Toh browser normal JSON nahi bhejta.
Browser file ko ek special format mein bhejta hai:
multipart/form-data
Is format mein:
File bhi hoti hai
Text data bhi ho sakta hai
Binary data bhi hota hai
Problem?
Express directly is format ko properly handle nahi karta
Isi liye humein Multer chahiye.
Lesson 2: Multer Kya Hai?
Multer ek middleware hai jo Express mein file uploads handle karta hai.
Simple words mein:
“Multer browser se aayi hui file ko receive karta hai aur server mein save karta hai.”
Lesson 3: Multer Install Karna
npm install multer
Ab hum uploads handle kar sakte hain
Lesson 4: Sabse Basic Upload Setup
const express = require('express');
const multer = require('multer');

const app = express();

const upload = multer({
  dest: 'uploads/'
});
Yaha:
dest: 'uploads/'
ka matlab hai:
“Uploaded files ko uploads folder mein save karo.”
Lesson 5: Upload Route Banana
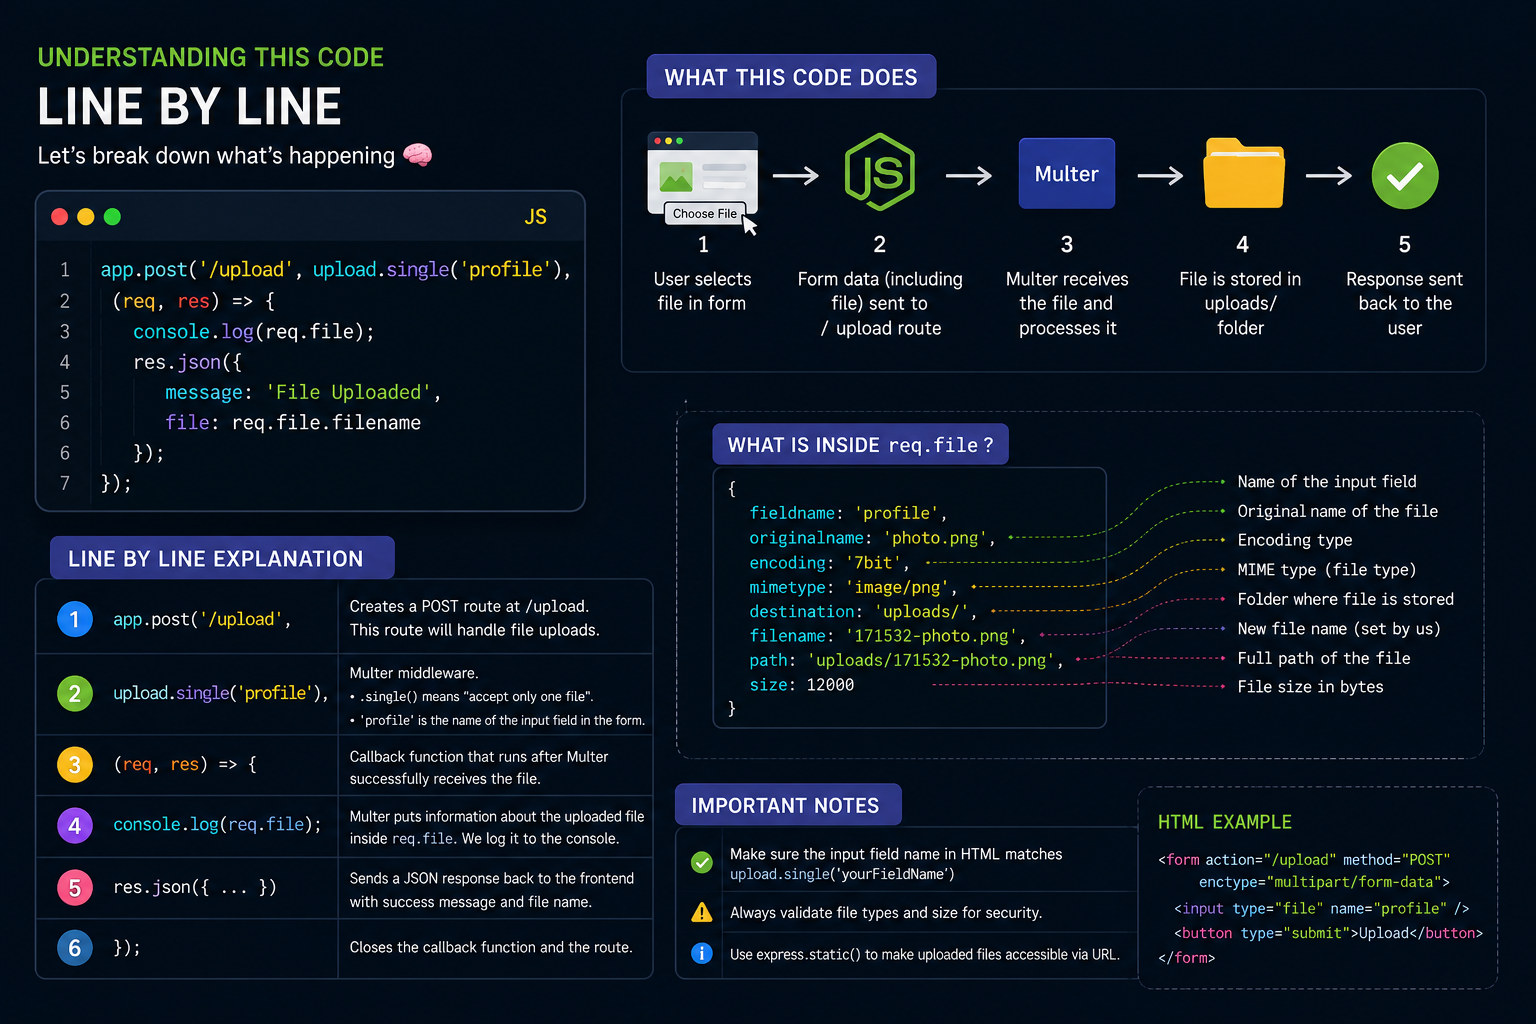
app.post('/upload', upload.single('profile'), (req, res) => {

  res.send('File Uploaded');

});
Yaha:
upload.single('profile')
Frontend mein:
<input type="file" name="profile">
profile dono jagah same hona chahiye.
Lesson 6: File Actually Store Kaha Hoti Hai?
Upload ke baad file physically server ke andar save hoti hai.
Example structure:
project/
│
├── uploads/
│   ├── abc123.png
│   └── xyz456.pdf
│
├── server.js
└── package.json
Ye files ab server disk mein exist karti hain.
Lesson 7: Multer File Ko Rename Kaise Karta Hai?
Default setup random names de deta hai.
Lekin hum custom names bhi de sakte hain.
const storage = multer.diskStorage({

  destination: function(req, file, cb) {
    cb(null, 'uploads/');
  },

  filename: function(req, file, cb) {
    cb(null, Date.now() + '-' + file.originalname);
  }

});
Output:
171532-photo.png
Lesson 8: File Rename Karna Important Kyun Hai?
Suppose 2 users same file upload karein:
photo.png
Agar rename nahi kiya:
Old file replace ho sakti hai
Isliye timestamp add karte hain:
171532-photo.png
Ab filename unique ho gaya
Lesson 9: Local Storage vs External Storage
Ab important question
Uploads ko kaha store karna chahiye?
Do options hote hain.
Option 1: Local Storage
Files same server mein store hoti hain.
Example:
Server
 ├── App
 └── uploads/
Good for:
Small projects
Practice apps
Learning
Problem:
Agar server delete ho gaya toh files bhi ja sakti hain
Option 2: External Storage
Files cloud services pe store hoti hain.
Examples:
AWS S3
Cloudinary
Firebase Storage
Flow:
User → Node.js → Cloud Storage
Good for:
✅ Large apps
✅ Better scalability
✅ Better backups
✅ Faster delivery
Lesson 10: Browser Uploaded File Kaise Access Karta Hai?
Abhi file server mein save toh ho gayi…
Lekin browser usko access kaise karega?
Uske liye Express mein static serving use karte hain.
Lesson 11: Static Files Kya Hoti Hain?
Static files matlab:
Images
PDFs
CSS files
Videos
Jo directly browser ko serve ki ja sakti hain.
Express mein:
app.use('/uploads', express.static('uploads'));
Iska matlab:
“uploads folder ko public bana do.”
Lesson 12: URL Se File Access Karna
Suppose ye file exist karti hai:
uploads/photo.png
Ab browser mein open kar sakte hain:
http://localhost:3000/uploads/photo.png
Browser directly image dikha dega
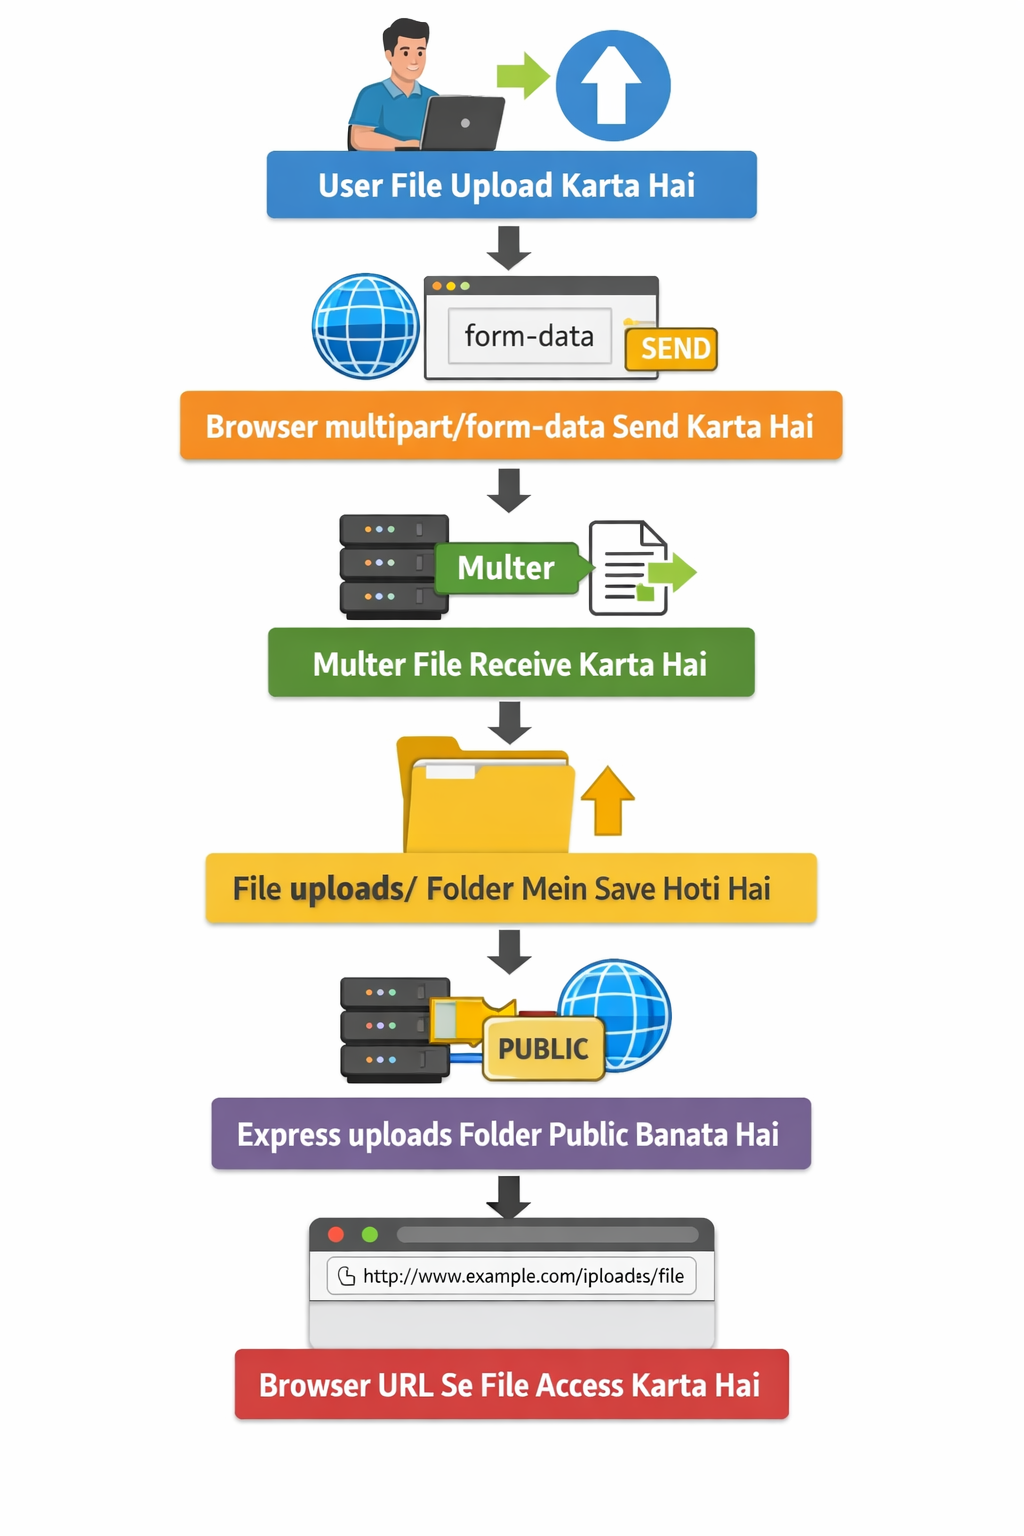
Lesson 13: Static File Flow Samjho
Lesson 14: Upload Folder Structure
Production apps mein files organize karna important hota hai.
uploads/
│
├── images/
├── documents/
├── videos/
└── temp/
Benefits:
✅ Easy maintenance
✅ Better organization
✅ Cleaner backups
Lesson 15: Upload Security Bahut Important Hai
File uploads dangerous bhi ho sakte hain.
Agar validation na ho toh attackers harmful files upload kar sakte hain.
File Type Validation:
const fileFilter = (req, file, cb) => {

  if (
    file.mimetype === 'image/png' ||
    file.mimetype === 'image/jpeg'
  ) {

    cb(null, true);

  } else {

    cb(new Error('Invalid file type'));

  }

};
Sirf PNG aur JPG allow ho rahe hain.
Lesson 16: File Size Limit
Large files server slow kar sakti hain.
limits: {
  fileSize: 2 * 1024 * 1024
}
Yaha max limit 2MB hai.
Lesson 17: Dangerous Files Avoid Karo
Kabhi allow mat karo:
.exe
.bat
.sh
Ye server ke liye risky ho sakti hain.
Lesson 18: Complete Upload Example
const express = require('express');
const multer = require('multer');

const app = express();

const storage = multer.diskStorage({

  destination: 'uploads/',

  filename: (req, file, cb) => {
    cb(null, Date.now() + '-' + file.originalname);
  }

});

const upload = multer({
  storage,

  limits: {
    fileSize: 2 * 1024 * 1024
  }
});

app.use('/uploads', express.static('uploads'));

app.post('/upload', upload.single('profile'), (req, res) => {

  res.json({
    message: 'File Uploaded',
    file: req.file.filename
  });

});

app.listen(3000);